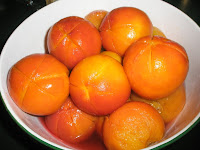
 This time of year the peaches are ripe and literally the size of softballs, which is the ideal time to make some peach jam. So, let's get her going.
Preparing The Peaches:
To me, the hardest and most time consuming part is having to parboil, peel, and pit the peaches. If they are really ripe, par-boiling might not even be necessary. If not overly ripe they need to be par-boiled for one minute.
If they aren't quite all the way ripe, you should cut a simple crisscross pattern on the bottom of each peach. Boil each peach around 4 to 5 minutes. This makes them much easier to peel.

That done, set the peaches aside and allow them to cool to the point you can handle them. I also use surgical gloves for the peeling and pitting part. Now, I do as many as 12 to 18 pounds of peaches at a time, since it's such a major pain in the
 Once you have run each batch through the food processor (I only use the pulse button so there will be small chunks), batches can be stored in large containers in the fridge for up to 4 days. It won't matter if the top layer turns a bit brown, just stir before using. It's fine. I also sometimes go ahead and add the lemon juice, which helps. You can also cover it with cling wrap and see that the wrap makes contact with the pureed fruit, then refrigerate. This will help to reduce the darkening effect. Now, you're done with the preparation process.
Preparing The Jars:

I always, without fail, run all the jars and lids through the dishwasher first. However, just to be absolutely certain they're all santized, I also boil RO water in a large stockpot and boil each jar for 15 minutes.
Use a smaller pan to accommodate the lids and rings. All you have to do is pour boiling water over them and let sit until you're ready to use them. I place a large area of clean paper towels out to turn the lids and jars onto when I'm ready to use them.
Preparing The Jam:
Ingredients:
1/8 Teaspoon allspice (optional)
1 Package of Sure-Jell Reduced Sugar Pectin
3 Cups granulated sugar
2 Tablespoons lemon juice (about 1 whole lemon)
Directions:
1. Pre-measure 4-1/2 Cups of pureed fruit into a large pot.
2. Pre-measure the 3 Cups of sugar.

3. In another bowl mix about 1/3 of the sugar in with the Sure-Jell powder. Set this and the other bowl of sugar
aside.
4. If you haven't already added the lemon juice, do so now. You can also add the butter and the Allspice and mix together thoroughly.
5. Heat the mixture over a medium-high flame or med-hi setting on electric stove.
6. When mixture begins to bubble all around the edges, add the remaining amount of sugar, turn the burner to high, stirring constantly.
 7. When the fruit comes to a full rolling boil, cook for exactly one (1) minute, stirring constantly. Turn off burner.
8. Begin filling jars with jam, making sure to wipe the tops & threads of the jars with a warm, wet cloth.
9. Immediately put the lids on, screw down the rings, and turn over the jars of jam for 15 to 20 minutes. Don't screw the rings too tightly or it may have an effect on the seal. Just make it firmly tightened, not over tightened.
10. When the time is up, turn the jars back over (upright) and listen for the pops, letting you know the seals have worked.
 Trust me when I say people will vie for your friendship once they have tasted this jam. It is absolutely amazing, but you might want to refrain from sitting down to eat an entire jar. There is usually a little amount left over from each batch, so I just put it in a refrigerator container for our own personal use.
Bon Appetit!


