Thursday, December 31, 2009

Texas Caviar... A New Year's Tradition And Perfect For A Blue Moon

Since the New Year is upon us, I will risk posting this recipe again because I love it. It's the absolute best party food there is for New Year's Eve and goes great with champagne. Well, it does here in Texas anyway.

Texas Caviar:

Ingredients:


2 cups fresh black-eyed peas (hulled)
1/2 green pepper, diced

1red bell pepper, diced
2 large jalapeno peppers, seeded then diced
3 to 4 green onions, thinly sliced
1/2 cup extra virgin olive oil
6 cups water (or chicken stock if preferred)
1/4 cup white wine vinegar

dash of Worcesteshire sauce
dash of Tabasco sauce
1/2 teaspoon crushed red pepper flakes
1 clove garlic, split

parsley or cilantro, finely chopped
1/4 teaspoon salt


Directions: 


Pick through beans and remove any that are damaged or spoiled. Also, remove any remaining hulls.

In a large saucepan bring water to boil and add peas and garlic. Cook until peas are tender. Rinse peas under cold water to stop cooking process. Drain thoroughly, remove garlic, and combine with green pepper, red pepper, jalapeno, parsley, onion, oil, vinegar, Worcesteshire and Tabasco sauces, pepper flakes and salt. Mix well. Cover and refrigerate for at least 2 hours (more is better). Transfer to a relish dish and serve with a slotted spoon to allow liquid to drain.

 
Can be tossed with greens to serve as a salad.
With proper refrigeration, can last for a week or more.


And, I hope everyone has a very happy and prosperous New Year!!!

Saturday, December 26, 2009

Quick And Easy Christmas Gingerbread House


Back when my children were still in grammar school, we used to make one Gingerbread house every Christmas and this is the simplest recipe for making it that I've come across to date. Of course, this recipe is strictly for decorative purposes since I use a hot glue gun and real egg whites. However, no one where we live carries meringue powder, so I found a recipe for Royal Icing that uses egg whites instead of the powder, making it all quite simple.


The icing does harden rather quickly, so you must work as fast as possible. However, I have found that if you use a pastry bag, it lasts longer before hardening. So, it's best to gather all the things you will need before you start.


I begin by covering a large, thick piece of cardboard with aluminum foil, to be used as the base. Next, I cut off the top of two large juice cartons to my desired height and hot glue each one to the base. Then you can start gluing the graham crackers to the juice cartons, making arches with them to form the rooftops.  Don't worry about the gaps as you will be able to fill them all in with the icing.


Once you finish filling in all the gaps with Royal Icing, add the candies however you like. You will also be attaching the candies with the icing. However, if you run out of the icing you can always use the glue gun again.


Things You Will Need For The Gingerbread House Assembly:


hot glue gun

glue sticks

red and green licorice sticks


assorted Christmas candies

1 bag of red hots


1 pkg. of small candy canes


1 box of graham crackers

1 large bag of powdered sugar


2 large egg whites


1 lemon


1 pastry bag


Royal Icing Using Egg Whites:

2 large egg whites

2 teaspoons fresh lemon juice

3 cups (330 grams) confectioners (powdered or icing) sugar, sifted


Sunday, December 13, 2009

Creamy Spinach Souffle With Grilled Tuna Steaks And Sour Dough Bread With Roasted Garlic

My hubby absolutely loves this recipe for Spinach Souffle so I make it fairly often now. In fact, I think I can make it with my eyes closed at this point. Although I originally got the recipe off the internet, I made a few subtle changes which have, I believe, enhanced the flavor from the original recipe. This one recipe usually covers the two of us for at least two nights of meals and yes, it's perfectly delicious reheated.

Spinach Souffle My Way:


Ingredients:
1 large bag of fresh baby spinach (pre-washed) (or you can use two packages of frozen spinach)

4 fresh large eggs, separated and at room temperature

1/2 cup yellow onion, finely diced

1/2 cup celery, finely diced

1 cup of milk (or heavy cream)

3 to 4 Tablespoons of butter

4 Tablespoons all purpose flour

1/2 cup of freshly grated Parmesan cheese

1/2 teaspoon of pepper, freshly ground

dash of Cayenne pepper

1 teaspoon of salt (or to taste)


Directions:


1. Take the eggs out of refrigerator about 30 minutes prior to starting so they will be room temperature by the time you start. Separate the egg white into a medium mixing bowl and the yolks into a small bowl. Set aside.


2. Steam the spinach until done and set aside to let drain. Since it won't drain out the amount of moisture you need to get out of the spinach, you'll probably have to use paper towels and press the spinach with the towels until no more significant amount of moisture comes through. Chop and set aside.


3. In a medium saucepan make your basic white sauce using the butter and the flour, whisking until smooth and beginning to thicken.


4. Gradually add the milk, stirring until smooth and beginning to thicken. Remove from flame.


5. Beat the egg yolks and very gradually add a little bit of the white sauce into the yolks. Mix and scrape that mixture back into the pan with the white sauce and stir. Set aside.


6. In a small saucepan, cook the onion and celery until just turning transparent.


7. Beat the egg whites with a whisk until they make good stiff peaks.


8. Add everything else except for the egg whites and stir until combined.


9. Last, carefully fold in the egg whites and add the entire mixture to a souffle dish or casserole dish.


10. Place in preheated 325 degree oven for 40 to 50 minutes or until inserted knife comes out clean. Let stand about 5 minutes, then serve.


Grilled Sushi Grade Ahi Tuna Steaks:


I always grill my tuna steaks the same way I grill a ribeye or a New York strip steak. I use the touch method.It's when you make a fist with your thumb inside. Touch the fleshy part of the fist and that is medium rare. Once you get used to it, it's the most accurate measurement of doneness that there is and it's always with you.


When the tuna steaks are cooked to your preference move onto a plate and apply a pat of butter on each.


Serve with sour dough or French bread and roasted garlic, which you can bake at the same time the souffle is baking.


Wednesday, December 9, 2009

Pan Fried Pork Tenderloin With A Pomegranate Reduction Sauce And Cowpoke Appaloosa Pinto Beans


This recipe comes from one of my favorite cookbooks, Texas Home Cooking, written by Cheryl Alters Jamison and Bill Jamison. The only variation I've made is that I've used Anasazi (Appaloosa) beans along with the pinto beans and I didn't have a coke on hand so I used a Tecate beer. Their flavor only enhances the taste of the pinto beans. Oh, and I also used chicken broth in place of water, once the cooking began as well as ten times the garlic.


Cowpoke Pintos:


Ingredients:


1 pound dried pinto beans, soaked overnight (or 1/2 pound of pintos & 1/2 pound of Anasazi beans)

8 cups of water


12 ounces of Coca-Cola (or ginger ale, Dr. Pepper, or beer)

1 14-1/2 ounce can whole tomatoes, undrained

1-1/2 medium onions, chopped

1/4 to 1/2 cup tomato-based barbecue sauce

2 to 3 pieces slab bacon, chopped

3 Tablespoons Chili Powder

2 Tablespoons Worcestershire Sauce

4 garlic cloves, minced

3 to 4 fresh serranos or jalapenos, seeded and minced

2 teaspoons of ground cumino or Mexican oregano

1 teaspoon salt, or more, to taste


Directions:


1. In a Dutch oven or heavy stockpot, combine all the ingredients except the salt.

2. Bring to a boil over high heat, then reduce to a simmer.

3. Cook slowly, stirring up from the bottom occasionally, for at least two hours, adding more water if the beans begin to seem dry.

4. If you cook the beans on a fire that's too hot, the skins of the beans will crack and curl, so be sure to keep the flame low. I cook them all day, very slowly.

5. Stir in the salt in the last few minutes of cooking. The beans should hold their shape but be soft and just a little soupy.

6. Serve in bowls with some of the liquid. Add cornbread and you're done.


Pan Fried Pork Tenderloin With Pomegranate Reduction Sauce:

Ingredients:


  • 3/4 teaspoon ground cumin
  • 3/4 teaspoon ground coriander
  • 3/4 teaspoon black pepper
  • 1/2 teaspoon ground cinnamon
  • 1/2 teaspoon salt
  • 2 pork tenderloins (each about 3/4 pound)
  • 2 tablespoons olive oil
  • 1 cup plain pomegranate juice (such as POM Wonderful)
  • 3/4 teaspoon cornstarch
  • 1 tablespoon water
  • 1 to 2 teaspoons Sherry vinegar
  • 1 tablespoon unsalted butter
Directions:

1. Stir together cumin, coriander, pepper, cinnamon, and salt in a shallow bowl. Pat tenderloins dry and dredge in spice mixture until evenly coated.

2. Heat oil in a 12-inch heavy skillet over moderately high heat until hot but not smoking. Reduce heat to moderate and cook pork, turning occasionally, until meat is browned on all sides and thermometer inserted diagonally into center of each tenderloin registers 145°F, 20 to 25 minutes. Transfer pork with tongs to a cutting board (reserve skillet) and let stand 10 minutes.

3. While pork stands, pour off and discard any fat from skillet, then add pomegranate juice to skillet and boil over moderately high heat until reduced to about 2/3 cup, about 3 minutes (if side of skillet begins to scorch, reduce heat to moderate). Stir together cornstarch and water and whisk into juice, then boil sauce until thickened slightly, 1 to 2 minutes.

4. Remove from heat and add Sherry vinegar to taste, then swirl in butter until incorporated. Pour sauce through a fine-mesh sieve into a bowl and skim off any fat. Season with salt. Slice pork and serve with sauce.


The beans and pork are even better the second night. Crumble some cornbread into a bowl and pour beans with liquid over the cornbread. Serve with the sliced pork tenderloin with pomegranate reduction drizzled over the top.


On another note, the Coca-Cola purportedly reduces the gaseous effect of beans. However, nothing much works if you go dancing afterward....


Oh, and guess who I saw today? The lovely Felicia. I wanted to go out and put a blankie over her (it's COLD!) Mr. Snoots just looked at me with a raised eyebrow.... I didn't do it. But, she looked really cold!

Tuesday, December 1, 2009

Santa Fe Green Chili Appetizer Cheesecake... My Absolute Best Hors d'oeuvre


I wanted to be sure and get this posted before the holidays so that you can try this on friends and  family. Believe me, they will thank you for it. You can make one large cheesecake or two small cheesecakes, but you're on your own for topping adjustments. I tend to go overboard.


I've always been a stay-at-home mom by choice but back in the days when the kids were growing up, I was always looking for ways to make a little extra cash on the side. When I first found this recipe I fell for it instantly and would make one for every party we had. Our friends went as nuts over it as did I, and soon people began asking me to make one for this or that function and somehow, it turned into a small business. During the holidays I would get so busy that I'd have to make these around the clock. It was a good thing I had double ovens, but I could have used at least five.


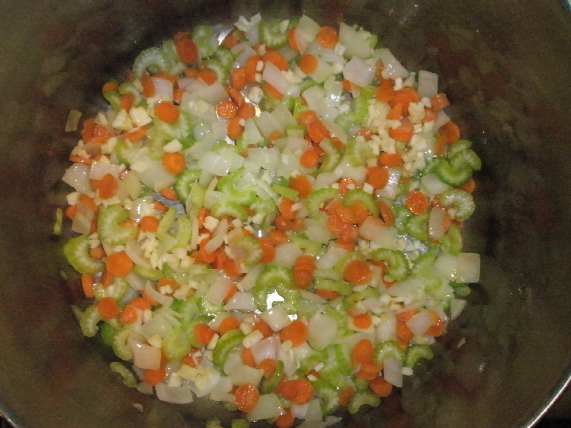
Please ignore the position of the pictures, as they ARE in order. I just didn't have enough room to add them all through the recipe portion.


Anyway, I made enough money selling my cheesecakes to send both kids to camp every summer for two weeks, so it worked out to be a great deal. Eventually, I grew so tired of making the appetizer cheesecakes that I completely stopped making them. Honestly, just the thought of making another one seriously made nauseous. I make several others I feel the same about as well. I'll get to those at a later date.


So, fast forward to the present (15 years later) and I suppose it had been a long enough hiatus from cheesecake making, that I almost missed making them. Last night our best friends were having a cocktail party so I offered to make one and of course, they accepted with enthusiasm. Now that I've made one again, I can't believe I used to crank out something like 10 to 15 per day. However, when eating it again, I realized how much I've missed it. It's as amazing as it is festive.


This cheesecake is so delicious and always proves to wow the crowd. It's been tweaked so many times from the original recipe that I have the right to now call it mine, so I'm going to share it with all of you now.


Santa Fe Green Chili Appetizer Cheesecake:


Ingredients For Cheesecake:


Crust:


1 cup of crushed tortilla chips

3 Tablespoons of unsalted butter (a bit more, if needed)

Filling:

1 cup of cottage cheese

4 eggs

3 8-oz. packages of lite cream cheese, softened

2 small cans of Hatch (or other chile) chiles

2 large jalapenos, seeded and chopped

2 teaspoons Mexican cumino (ground)

20 ounces of sharp grated cheddar cheese


First Topping:

1 8-ounce container of sour cream

1 8-ounce container of cheddar-jalapeno dip (I use the Frito Lay brand)


Final Topping:

1 8-ounce container of sour cream

2-3 fresh tomatoes, diced

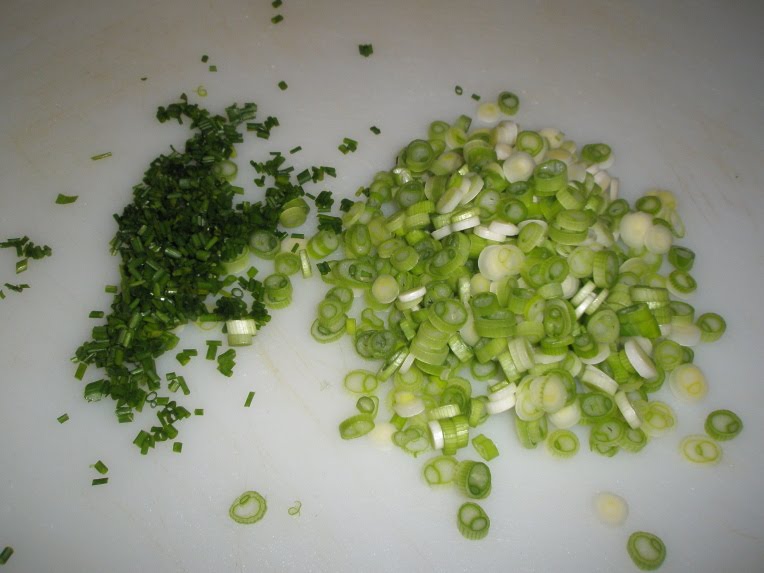
2 bunches of green onions, chopped

2 small cans of sliced black olives


Directions:

Crust:

1. Preheat oven to 325 degrees. Place crushed tortilla chips in a bowl and drizzle the melted butter over the chips. Toss well to coat all. Press the mixture into the bottom of spring-form cheesecake pan, place in middle of oven and bake for 12 to 15 minutes, or until lightly browned.


2. Remove from oven and set aside. After it cools, place in fridge so the butter can harden the mixture that will be the crust.


Filling:

1. In a food processor, process the cottage cheese until smooth and creamy.


2. Next, add all four eggs, one at time, to the processor.


3. Add each of the three packages of cream cheese, one at a time, processing in between each addition.


4. Once it is all combined to a creamy smooth consistency, add the 20 ounces of grated sharp cheddar cheese. Process for a couple of minutes, or until cheese is nicely combined and almost smooth.


5. Last of all, add the chopped jalapenos and the cumino. Process until combined.


6. Take cheesecake pan out of fridge. Very carefully pour the mixture from the bowl of the processor, being careful to remove the steel blade first, since you don't want it to go splat in the middle of your lovely masterpiece.


7. To keep the weight of the filling from from disturbing the crust, I pour the mixture onto a rubber spatula, allowing it to drip slowly off that.


8. Place cheesecake in the center of the oven and bake for one  hour, or until it's just a little wobbly. You don't want it fully cooked yet.


9. While the cheesecake is baking, you can whisk together the 8-oz. containers of sour cream and cheddar-jalapeno dip until thoroughly blended. Place in the fridge until the cheesecake comes out of the oven.


10. When the hour is up, remove the cheesecake from the oven and top with the refrigerated sour cream and cheese mixture and return it to the oven for an additional 20 to 25 minutes.


11. When you take the cheesecake out of the oven make sure that you can place it in a draft free area, allowing it to cool slowly. When cooled, wrap with plastic wrap and place in refrigerator for at least 10 to 12 hours. It can also be frozen for up to 2 weeks at this point.


12. After allowing the cake to chill, top the cheesecake with the 8 ounce container of sour cream, like frosting on a cake.


13. For the rest of the topping, sprinkle the chopped tomatoes first, chopped green onions second, and then add the sliced black olives. Serve on sturdy tortilla chips (Doritos won't be able to support it. You need a good thick tortilla chip.)


IMPORTANT NOTE: This is seldom, if ever, served like a normal cheesecake, although I've known some people to serve small slices of it on a salad plate with tortilla chips. The object is to use a knife to take a small slice and place on the tortilla chip (be sure to use thick, sturdy chips), being sure to get a bit of the topping as well. (Sorry, I forgot to photograph once we arrived at the party.)

I hope you enjoy it! I know your guests will...


I also meant to add that the cheesecake can be frozen for up to two weeks (without sour cream and toppings) and it will also accommodate two small cheesecake pans.

Monday, November 30, 2009

MiMi's Medicinal Home Made Chicken Soup... The Cure For Snowy Weather


When the weather turns cold the first thing I do is start making soup. Strangely enough, I always seem to have all the ingredients I need on hand. Actually, I've had the ingredients for a week as they were leftover ingredients I didn't need for Thanksgiving. I shopped at Sam's Wholesale Club so, as usual, I bought too much but, I'd rather have too much than not enough of something. So, I'm trying to finish off the onions, garlic, parsley, celery and carrots. All the perfect ingredients to go in my home made chicken soup. I've had a nice plump little chicken in the freezer just begging to be pulled out.


So, without further adieu, here's my recipe, which I learned from my grandmother (MiMi), who was of German descent. I wish I'd had more time to learn from her before she was gone, because she was one of the most wonderful cooks ever.


MiMi's Medicinal Homemade Chicken Soup:


Ingredients:


For The Broth:

3 to 4 stalks of celery (with the leaves), coarsely chopped

1 large yellow onion, peeled and quartered

4 to 5 spring (green) onions

8-10 cloves of garlic, halved

1 whole bay leaf

1 teaspoon of whole black peppercorns

2 teaspoons of salt

1 whole chicken

8 cups of water


Directions:

1. In the morning, start your broth by filling the stock pot with water and adding all of the ingredients for the broth.

2. Bring the pot almost to a boil, but not quite. It needs to simmer very slowly all day and not boil. 3 to 4 hours is usually enough time, but I usually let it steep for a while.

3. When the stock is ready, remove all of the ingredients, setting aside the chicken to cool and add the veggies to your compost pile or your trash.

4. At this point I use a couple of layers of cheesecloth inside a colander, to drain the broth. Rinse the stock pot and and return the broth to the pot.

5. Bone the chicken and tear into bite size pieces. Now you're ready to make the actual soup.

Chicken soup:

Ingredients:

2 to 3 stalks of celery, diced

1 medium yellow onion, peeled and chopped

1 package of baby carrots, sliced & chopped (or shredded carrots, chopped)

1 package of fresh mushrooms, cleaned and chopped

5 to 6 cloves of garlic, pressed

1 teaspoon of olive oil

2 teaspoons of butter

8 cups of the broth you previously made (or you can use 2 cartons of organic chicken broth)

2 teaspoons of chopped parsley

1 teaspoon of kosher or sea salt

1/4 teaspoon black peppercorns, ground

1/2 of a package of egg noodles


Directions:

1. In the olive oil and butter, saute the onions, celery, carrots, mushrooms, and garlic in that order, until almost transparent.

2. Add the broth and allow the soup to simmer and cook the veggies for at least another 1-1/2 hours.

3. Add the chicken, chopped parsley, salt and pepper and allow to simmer a while longer.

4. Boil the egg noodles in another pan, drain and set aside. I've found that adding them to the soup soaks up all the liquid and then they fall apart.

5. Place noodles in bottom of bowl and pour soup over the top.

6. Serve with healthy crackers or sourdough bread. Enjoy!

7. I have to admit I forgot to add the parsley before taking the picture, so it's not nearly as attractive as it should be.


Wednesday, November 25, 2009

Twice Baked Potato Casserole... Perhaps My Best Holiday Side

For years I tried like crazy to make twice baked potatoes but they just never seemed to turn out right. Some years they were too wet and other years they were too dry. Then, I discovered this recipe and I'll never stray. When you know you've found something this good you tend to stick with it.

So, I'm going to share it with you and hope that you like it as much as we do.

Twice Baked Potato Casserole:

Ingredients:

5 pounds of baking potatoes, peeled and quartered (or skin left on for baking)

1 stick of butter

3 cups of shredded sharp cheddar cheese

1 cup of Half & Half or milk

1 cup sour cream

1/2 of an 8-ounce block of cream cheese, cut into smaller chunks

2 large eggs

1 cup green onions, chopped

2 tablespoons chopped chives

1 tablespoon dried or 2 tablespoons fresh chopped parsley

3/4 cup of crispy bacon, crumbled (2 to 3 slices of slab or 3 to 4 slices of regular bacon)

2-1/2 teaspoons of salt

1 teaspoon of  freshly ground black pepper


Directions:

1. Bake or boil the potatoes. I prefer just boiling them, covered in water. When a fork can be easily inserted, remove potatoes from flame and drain in a colander. Place potatoes back in pot and mash the potatoes with a potato masher.

2. Add the butter and keep mashing until you have a pretty smooth consistency.

3. Now you can add the cheddar cheese, sour cream, milk, eggs, cream cheese chunks, green onions, chives, parsley, salt, pepper and bacon and stir until well blended. Make sure you reserve a little of the bacon and the shredded cheese for the topping.

4. Pour the mixture (it will be thick) into a large casserole oven dish and smooth out. Sprinkle the reserved shredded cheese and bacon over the top. You can also sprinkle some green onions over the top when done.

5. Bake uncovered in a preheated 350 degree oven for approximately 40 to 45 minutes.

Sunday, November 22, 2009

The Reason I Didn't Have A Garden This Year... Meet Fernando And Felicia Fox


We have lived in the same house now for almost 25 years (never really a good idea) and I'd say I've had a garden almost every year, save for a few. This year I bought my seeds and plants and readied the garden for planting. Then, it happened. I saw Felicia and Fernando out in our garden (which is beyond the backyard behind the cinder block fence). Seeing this pair together is nothing new, as they have lived on our property for many years and foxes are monogamous unless one dies.


However, this year Felicia apparently felt secure enough to dig a den under the old playhouse out in the garden area, which is where she gave birth to four of the cutest pups you've ever seen. In the beginning when I first discovered (like 15 or 20 years ago) them on our property, I tried to get Animal Control to catch them. They cracked up and said good luck with that. It was then that I decided it was time to make peace with the foxes and learn to live in harmony.


They used to do almost as much damage to my tomatoes as the birds do until I figured out it was wiser to just plant a couple of extra plants for them, that weren't in cages. That seemed to work. They no longer worked their snouts through the wire cages to take nibbles out of my tomatoes.


Anyway, the foxes used to keep pretty much of a low profile until Felicia and I began our strange form of bonding, which goes pretty much like this: I sit on the patio in the mornings (during warm weather anyway) and drink my coffee, watching for hummingbirds. I'm looking up, right? Felicia (who thinks she owns our property now) is strolling down the sidewalk toward the patio, looking down. Kind of like foraging. At almost the same instant we realize how close we are to one another and momentarily freak out... both of us. I run into the house and she runs back to the garden.


When the next encounter presents itself, I'm sitting on the patio and happen to notice Felicia lying down on the cinder block fence, nearly hidden by the trumpet vine. She sees me and knows that I see her and we have have a sort of silent bonding, as it were. The next time I saw her she had moved a little closer and was lying on the sidewalk out by the backyard flower beds, quite comfortable with the fact that I was there as well. By the end of the summer it had become old hat to be in the presence of one another. Oh Yeah! We're tight, I'm telling you.


The next encounter was during an evening when we had our best friends over for dinner on the patio. During dinner I related my story of Felicia and Fernando and they suggested we go out to garden and see if we can see them. I agreed and we all walked out to the garden. To my shock and amazement, Felicia is there with four of the most precious pups I have ever seen. Our friends got so excited over seeing them that they were nearly beside themselves and sneaked quietly out to the garden again before they left to go home. I had only seen her pups once before, about 5 or 6 years earlier, so this was such a treat.


Anyway, Felicia got into the habit of letting the pups out of the den every day in the late afternoon and evening, so I'd go out every evening to take pictures (discreetly) over the fence. Once I saw those four little wild hooligans I realized why Felicia looked so emaciated. I'd been there before myself. Kids... gotta love 'em! But, they do wear us out and take a toll on our minds and bodies.


I had already decided to give the garden up this year just for the sheer joy of watching this little family and it gave me a great deal of pleasure all summer long. Now, a lot of people have cautioned me with a lot of their knowledge about foxes, but you must realize that Felicia and I have found a certain peace with one another. This is not a common occurrence but we take care of our critters at this house.... be they wild or domestic. Every time hubby shoots a squirrel with his pellet gun, he heaves it over the fence to the garden then goes out a few hours later to find it gone.


Felicia clearly thought, "OMG! This is manna from Heaven. I love these people!" We love her too. They have something like 10 or 15 dens on our property of which I've only found five. Now, Felicia and Fernando are pretty much hiding out for the fall and winter but gray foxes are all the same. They mate in late January to the middle of March and 90 something days later she has a new litter of pups. The litters usually range from 4 to 6 pups. The family all stays together throughout the spring and summer. The dad teaches the pups to hunt and the mom protects them. However, come fall, the entire family separates, with the mom staying in her local dens while the kids and dad go off on their own. The dad returns in the early part of the year and the cycle repeats itself. It's like taking a sabbatical from marriage every year, which sounds pretty damn good to me.


The funniest aspect to not having a garden is that this was the first summer I can remember in years that I haven't had back pain and had to constantly go to the chiropractor every week. Hello. I think I get the message...


I now know why foxes are so... well, foxy. They know when they are in danger and they know when they aren't. Felicia and Fernando know that they are safe here and they have never bothered my pets either, although I think my cat wants to play with them. Luckily, being an animal, the cat knows better than to attempt such foolishness. She might be crazy but she isn't stupid.


When I first started having a garden every year we didn't have things like farmer's markets or grocery stores that had divine organic offerings. Now we do. So, I think I might be done with gardening, backaches and horrid manicures. I think I'd rather watch the fox family at play, thank you very much!