Friday, December 17, 2010

Homemade Kahlua... Nothing Could Be More Simple

For the last (I don't know how many) years I've been giving pretty much the same thing to everyone, every year, for Christmas. One glass jar of peach jam and one glass jar of my hot chow-chow. This is the year I finally decided to *change things up*, for which I'm sure the recipients will appreciate the upgrade. Anything gets boring after monotony, right?

Although I hadn't planned on making the Chow-Chow this year, a friend dropped dozens of green tomatoes in my lap, so I have a sufficient amount of that for the Christmas *goodie bag*. However, I didn't make Peach Jam this year so I decided I'd make Kahlua and present them in really gorgeous blue glass bottles. When I ran out of those I used some old Grolsch beer bottles that I'd been saving for just this project (who knew?). They also had the same kind of closures, which is perfect.

I found the blue glass bottles with tops on line at Quality Wine & Ale Supply for approximately $4.50 each (when buying a case, including shipping costs). Of course, it's like trying solve a Rubik's cube puzzle getting the hardware on the bottle properly but I did eventually figure it out (a no-brainer really - duh).

Anyhoo, here is the easiest ever recipe for making your own Kahlua at home:

INGREDIENTS:

3-1/2 cups of sugar


1/2 cup instant coffee

3 cups water


1/4 teaspoon salt


2-1/2 cups of 100 proof vodka (or 80 proof if you prefer)


2 vanilla beans (slit to expose the seeds) or 1 tablespoon of real vanilla extract


Directions:


1. In a 3-4 quart saucepan, stir sugar and coffee. 

2. Add water and salt, heating over a high heat until sugar dissolves.

3. Bring to a boil.


4. Reduce heat and boil gently for 1 hour.


5. Remove from heat.


6. Allow to cool for at least an hour.


7. Stir in vodka and vanilla, then bottle.


Give to friends and family and enjoy the compliments. One of my favorites ways to serve my Kahlua to guests is to pour it over homemade (or not) vanilla ice cream...

Tuesday, December 14, 2010

Seven Layer Dip... Always A Crowd Pleaser

This last weekend I was invited to the annual Desert Duffer Gals Christmas Pajama Party & Gift Exchange, for which we are required to bring our best dish. So, I took Seven Layer Dip, which everyone loves. This is my group of gal pals that makes up our golf tournament club, including our husbands. However, the guys aren't invited to this soiree.


Everyone wears PJ's, brings a gift worth $25.00 or less, and stealing of said gifts is allowed, to a limit. The food is always to die for and we have always have Mimosas as well as whatever other libations are presented to us.


So, I decided to make Seven Layer Dip this year and it was a huge hit. I barely had any left for bringing home to the hubby. Hope you're excited because here it is:


Seven Layer Dip:


Ingredients:


1 (1 ounce) package of taco seasoning


1 (16 ounce can) refried beans


1 (16 ounce) container of light sour cream


1 (16 ounce) container salsa


1 large tomato, chopped


2 bunches of green onions, finely chopped


2 packages of ready made guacamole


2 cups of Monterrey Jack & cheddar cheese, grated


1 (6 ounce) can of chopped black olives


1. Begin by blending the salsa with the refried beans. Spread on dish for the bottom layer.


2. Blend taco seasoning in with sour cream.

3. Spread sour cream mixture over refried beans.


4. Spread guacamole over sour cream mixture.

5. Sprinkle chopped tomatoes over dish.

7. Sprinkle green onions over dish.


8. Next, add the cheese mixture.


9. Sprinkle the chopped black olives over the entire dish, evenly.


Serve with sturdy corn chips or tostados.


Sit back and bask in the light of all the compliments you'll receive.

.....

Sunday, November 28, 2010

When In Rome, Do As The Romans Do.... Eat Bufala Mozzarella

I took a two week trip to Italy with another married lady friend in mid September, where I fell in love with food and eating again. Having struggled with my bouncing-ball-weight for more than 50 years, and having tried every diet available to woman, I suddenly learned to appreciate truly enjoying what I eat once again. Frankly, I'm not sure I ever had before. It was really refreshing for my soul. I could honestly get used to it except that I have no hilly streets or long steps to climb here, which seemed to be the key factor in eating what I wanted in Italy. Nor do I have anyone encouraging me to eat more. 


My friend and I rented a flat in the south of Rome, away from all of the normal madness of the tourist traps, in an attempt to create what we envisioned to be *the true Roman Experience*, which it was. It really was except that I had envisioned the 1950's and 1960's Italy, but today's Italy and the Euro make it a very different world indeed.


At any rate, my most favorite of all things edible in Italy was Bufala Mozzarella, which our lovely 75 year old neighbor (Gino) treated us to, several times, along with his homemade Limoncello. One night he invited us to dinner and after the caprese salad we dined on the most incredible tiny sea bass stuffed with the bufala mozzarella (made from Water Buffaloes). We felt truly honored to eat in the home of a native Roman, even if he was Sicilian by birth. He was quite the character and by far the most interesting person we met while in Rome. He seemed Hell-bent on making sure we had enough to eat, which proved to be the natural order of things since he was such an amazing chef.

So, before we even recovered from the jet lag, upon arriving back home in Texas, I attempted to re-create what we were introduced to. First of all, I present you with Caprese Salad:


Caprese Salad:

2 large fresh tomatoes, sliced to desired thickness (mine were from the farmer's market)

10-20 large fresh leaves of basil (dried will do if you find yourself in a pinch, like me)

bufala (or at least fresh) mozzarella, sliced to desired thickness

Balsamic vinegar, to taste

extra-virgin olive oil, to taste

sea salt, to taste

freshly ground black pepper, to taste

Directions:

Assemble ingredients in layers, except for the last four ingredients.

In a small bowl combine balsamic vinegar, olive oil, salt and pepper with a whisk and pour over the top of each plate.

Serve immediately with a good Italian wine, as a first course.

Alright, I might as well admit here that I was so overcome with jet lag, I wasn't able to make it to the market for fresh basil, and I had to use dried. So sue me. It was still quite good.......

Tuesday, November 16, 2010

Potato Latkes (Pancakes)... What Could Be Better?

Since I've had this whole ongoing love affair with potatoes roughly since birth, I thought I'd share this lovely recipe for potato latkes (pancakes) with you today. Yes, it's true that I've been missing in action for like 5 months, but I'm back, so get over it. Now, let's get on with the recipe.


GRATED POTATO LATKES (PANCAKES):


INGREDIENTS:


4 medium (about 8 oz.)  Idaho potatoes, peeled and grated


2 eggs, beaten

1/4 - 1/2 cup all purpose flour

1/4 cup grated yellow onion

1 teaspoon of salt

1/2 teaspoon ground black pepper

2 Tablespoons finely chopped chives

1/4 cup vegetable oil


DIRECTIONS:

1. Mix first 7 ingredients, adding more flour if batter is too thin.

2. Drop large spoonfuls into pre-heated vegetable oil, about 3 per batch. Flatten out with spoon as quickly as possible.

3. Cook for 2-3 minutes over medium high heat or until golden brown.

4. Remove from pan and place on paper towels in warm oven.

5. Repeat until batter is gone.

6. Serve with dollop of sour cream on top, sprinkled with chopped fresh chives, or your favorite dipping sauce.

Saturday, May 29, 2010

Memphis Style Ribs With Mashed Potato Salad.... Memorial Day Celebration!

It's always such a relief when warm weather finally arrives and this year it's more of a relief than ever. Memorial Day weekend is the beginning of warm weather, which also signals the onset of cooking on the grill, which is just about my favorite way to cook most things edible. So, it only stands to reason that one of my first grilled meals of the summer season includes spare ribs. We love them in this house. And frankly, you just can't have ribs without having the traditional potato salad or coleslaw, right?


There must be at least a bazillion different ways to cook ribs (and I love them all) but today my ribs are done in the Memphis style.  

There are also just as many recipes for potato salad, but this is my favorite. I know I must be weird but I just don't like potato salad with the big ole chunks of hard potatoes. It probably has something to do with all the tooth and gum trouble I've had lately. However, I've always preferred my own potato salad to anyone else's.

Memphis Style Barbecued Ribs:

Ingredients:

3 lbs. of pork spare ribs

For Rub:
4 teaspoons paprika
2 teaspoons salt
2 teaspoons of freshly ground black pepper
1 teaspoon of cayenne

For Sauce:
2 cups ketchup
2 cups chopped onions
1 cup red wine vinegar
4-5 cloves of garlic, smashed
1/4 cup yellow mustard
1/2 cup brown sugar
1-2 teaspoons of Louisiana hot sauce


Directions:

1. Prepare ribs by removing the membrane on the underside and any loose meat or fat. 

2. Prepare smoker or grill. You will want to hold a temperature of around 225 degrees F for 4 to 6 hours.

3. Season ribs with Memphis rub and place on grill or smoker.

4. While ribs are cooking, make barbecue sauce. Blend together everything with the ketchup.

5. Place in a medium saucepan and cook over a medium-low heat for approximately 30 minutes.

6. Remove from heat and set aside. 

6. Cook ribs until they have an internal temperature of about 145 degrees F.

7. Cook the ribs about 30 minutes longer, basting with the sauce every ten minutes, when you turn the ribs.
 

Mashed Potato Salad:

Ingredients:

5 red potatoes
6 Yukon gold potatoes
2 tablespoons butter
salt & pepper, to taste
2 hard boiled eggs, chopped
1/2 cup mayonnaise
1/2 cup prepared mustard
1/2 cup sour cream
1 stalk of celery, finely chopped
1 red onion, finely chopped
2-3 tablespoons finely chopped parsley
1 tablespoon dill relish (or diced dill pickles)
1/2 bunch of green onions, finely sliced/chopped
1/2 red bell pepper, finely chopped

Directions:

1. Cube potatoes and place in medium size saucepan, covered with water.

2. Cook over medium heat until done.

3. Drain and place potatoes in a large bowl.

4. Mash potatoes with the butter, salt, and pepper.

5. Once mashed, stir in the remaining ingredients until well blended.

6. Refrigerate until ready to eat.


Tip: You can also use leftover mashed potatoes if that's all you have. And, you can change up the ingredients any way you like.

Monday, May 10, 2010

Spicy Italian Meatballs In Marinara Sauce Over Spaghetti

It's hard to believe I made it through 57 years of my life before finally attempting to make my own meatballs for spaghetti. Once I tried them, I was amazed at how simple they are to make. Furthermore, I found that I can make enough to put an equal amount on the table and in the freezer, for a future time when I don't really feel like cooking a huge meal. I was also surprised at how much more delicious they were than any meatballs I'd ever had, even at the best Italian restaurants. So, don't be afraid to try them yourself.

Mr. Snooty practically swooned over these meatballs, so I feel like my mission was fully accomplished. I think they would also be divine served as an appetizer in a bit of mushroom sauce. So, let's get to it.

Spicy Meatballs In Marinara Sauce Over Spaghetti Pasta:

Meatball Ingredients:

1 lb. ground sirloin

2 eggs

1/2 cup milk

1 cup Italian breadcrumbs

1/2 cup onion, chopped

2 tablespoons fresh parsley finely chopped

1 teaspoon oregano

3-4 cloves garlic, smashed & finely minced

1 teaspoon salt

1/2 teaspoon pepper


Ingredients For Sauce:

3 tablespoons olive oil

1/2 cup chopped onion

4 cloves garlic, smashed & minced

2 teaspoons salt

1 teaspoon dried oregano

1/2 teaspoon dried basil

1/4 teaspoon freshly ground black pepper

2 cans (26 to 38 oz.) crushed tomatoes

1 small can of tomato paste

1 cup red wine

1 cup beef broth (or more if needed)


Additional items:

16 ounces of spaghetti, cooked according to directions

shaved fresh Parmesan cheese, to taste


Directions For Meatballs:

1. In a large mixing bowl, lightly scramble the eggs. Add the remaining ingredients for meatballs and mix. I find the best way to do this is to mix it with your hands, but I do wear gloves.

2. Begin forming beef mixture into round balls. We like our small, but make them whatever size you like.

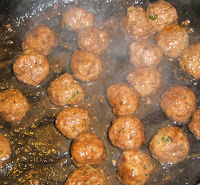
3. Brown the meatballs in a skillet with a little olive oil and beef broth, just enough to keep them moist.


4. When they are lightly browned, remove and set aside.


Directions For Sauce:


1. Saute the onion in the olive oil until almost transparent. Add garlic and cook a moment or two longer.


2. Pour the can of tomatoes into the pan, as well as all of the other ingredients. 


3. Cook over medium high heat until it begins to bubble, turning it down to a low simmer. 


4. Add the meatballs, cover the pan and allow to simmer for about 30 minutes.


5. Serve over cooked spaghetti pasta, topped with shaved Parmesan cheese, with garlic toast and a tossed salad.


Monday, May 3, 2010

Fresh Tomato, Herb, Garlic And Mozzarella Foccacia... The Easy Way

I fell in love with Foccacia many years ago and continue to carry the torch. There are so many ways you can prepare it, making it different every time you have it. The easiest of all ways is to use pre-made refrigerated pizza dough, spreading it out on a prepared cookie sheet.

Here it is:

Tomato, Herb, Garlic And Mozzarella Foccacia:

Ingredients:

1 Pillsbury Pizza Dough, divided into two parts

1 fresh tomato, thinly sliced

4 cloves of garlic, pressed

1 teaspoon olive oil

1 teaspoon dried basil

1 teaspoon dried rosemary

salt and pepper, to taste


Directions:

1. Spread prepared pizza dough out on cookie sheet to desired thickness (we like ours thin).

2. Cook garlic and herbs in olive oil for approximately one minute and remove from heat.

3. Using a pastry/basting brush, brush the garlic, herb, olive oil mixture over the pizza dough.

4. Top with thinly sliced tomatoes, then with grated mozzarella cheese.

5. Bake in preheated 425 degree oven for 10 minutes or until done.

6. When pulled out of the oven, sprinkle grated Parmesan cheese over the top and serve.

This is a great side for soup and a variety of other entrees. 


Bon Appetit!

Sunday, April 18, 2010

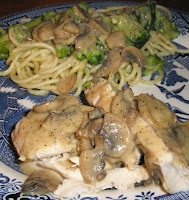
The Best Sauce For Chicken... Ever... Mushroom Sauce With Tarragon

I'm having a whole new love affair with the spice Tarragon. How could I have lived for 57 years before discovering the deliciousness of this herb? It must be my mother's fault. She was the Queen of Not Using Spices. It's always good to have a place to lay the blame, right?

Anyway, I discovered this wonderful herb while preparing this sauce to be served over roasted chicken. It was truly love at first bite. I'm now driving my Mr. Snooty crazy, wanting to put Tarragon in everything. He'll survive, I assure you. But all of a sudden I've become obsessed with sauces, which is never good for a *muffin-top* like me. Still, it's difficult to break an obsession, especially when you have no desire to. To me, this sauce is quite bland without the tarragon, so let's get to it, shall we?

Ingredients For Sauce:

1 - 8 ounce container sliced fresh mushrooms (baby bella or button)

2   Tablespoons olive oil

2   Tablespoons unsalted butter

2   cloves garlic, minced

2   shallots, chopped

1   Tablespoon fresh tarragon (but dried is perfectly acceptable)

salt & pepper, to taste

1   Tablespoon sherry wine vinegar

1   Cup low sodium chicken stock

1   cup half-n-half (or sometimes I just use milk)

2   Tablespoons cornstarch (or flour) mixed in 1/3 cup cold water


Ingredients For Chicken Breasts:

4   chicken breasts

3 Tablespoons flour

1 Tablespoon tarragon, fresh chopped (but dried is just fine)

salt & pepper, to taste


Directions:

1. Heat olive oil and butter in skillet.

2. Add mushrooms and shallots. Saute for 5 minutes.

3. Add garlic and tarragon and saute for 1-2 more minutes.

4. Stir in the chicken broth and allow to simmer while you prepare the rest of the meal.

5. Cover and set aside.

6. Stir in the milk and sherry just before serving.

7. Carve your roasted chicken (which can be purchased at almost any grocery store these days).

8. Pour desired amount of sauce over chicken slices.

9. This is also an excellent sauce for fish and other types of poultry. It's also quite tasty over veggies and pasta.

Thursday, March 25, 2010

Cioppino With Crab, Shrimp, And Mussels Served With Fresh Baked French Bread... Made With Leftover Tomato Basil Soup

So, as usual, I made far too much Tomato Basil Soup and we had some shrimp, crab and mussels in the freezer that needed to be used pretty quickly, so I decided to make Cioppino. This truly has to be one of my greatest seafood soup efforts to date. How do I know this? I know this because our son was in town at the time and he doesn't do seafood... and he ate 2 bowls of it. I'd say that's a pretty good indication. Of course, he also polished off a half a loaf of French bread right along with the Cioppino.

I started with the basic Tomato Basil Soup and added about a half a carton of chicken broth (unsalted). I brought it to a boil then turned it down to a simmer to let it reduce a bit. I also added a couple of teaspoons of a product called Superior Touch Better Than Bouillon Chicken Base. This stuff is amazing and also comes in beef and veal and vegetable. I haven't been able to do without it since I found it. It's magical stuff as far as flavor goes. They have a web site at www.superiortouch dot com.

I added some additional chopped fresh parsley, basil, a bay leaf and oregano as well as some extra garlic, because we love garlic. The aroma was simply hypnotic as we both waited in anticipation of our lovely warm bowls of Cioppino. We were not disappointed in any way.

Once the broth had reduced to my satisfaction (each to his own, you know) I timed the addition of the seafood to coincide with the loaf of bread being done. 

This is a great way to extend the Tomato Basil Soup recipe, although with a definite twist. You will not even recognize it but you will enjoy it immensely....

Sunday, March 21, 2010

Tomato Basil Soup With Grilled Gruyere Cheese Sandwiches

Since we're still experiencing cold weather, I'm still into making heavier meals, but worrying about having to bare this body in the spring has me rethinking that. So, I decided to make a nice, light Tomato & Basil soup. I didn't want to get out and go to the store so I simply used ingredients I had on hand. Using canned tomatoes gives me the rich, tart flavor I'm looking for because they are picked and canned at the height of their flavor. And, instead of having the run-of-the-mill grilled cheese sandwiches, I opted to use Gruyere cheese, which is much more flavorful. I also discovered we didn't have bread so I took some fairly old hamburger buns out of the freezer to use, which worked great

TOMATO BASIL SOUP:

Ingredients:

3 tablespoons olive oil

2 to 3 medium onions, chopped

2 (14-1/2) ounce cans of ground peeled tomatoes

5 to 6 cups of chicken or vegetable stock

2 chicken bouillon cubes

1/4 cup fresh parsley, chopped

1/4 cup fresh basil, chopped

3-4 leaves of Mexican oregano, finely chopped

5-6 cloves fresh garlic, crushed

Directions:

1. Heat the olive oil in a large soup pot over medium high heat.

2. Add the onion and cook for about 7 minutes. Add the garlic and cook 3 more minutes.

3. Add the crushed tomatoes and the stock. 

4. Bring to a boil and then reduce to simmer.

5. Cook until soup has slightly thickened, approximately 20 to 30 minutes. 

6. Season with salt and pepper, if needed.

7. Add the parsley, basil and oregano. 
 
8. Simmer for 10 minutes more.

9. Go ahead and place the pot in the sink and using a stick blender, blend the mixture to smooth or desired consistency.

10. Whisk together a tablespoon of sour cream with a tablespoon of milk and place dollop in center of soup.

10. Serve immediately or as soon as grilled cheese sandwiches are ready.

GRILLED GRUYERE CHEESE SANDWICHES:

Ingredients:

Bread - Whatever you have on hand - 2 slices per person

Gruyere cheese, sliced very thin

Butter or margerine or olive oil (I use a mix of butter and olive oil)
 
Directions:

1. Slice cheese and place on one slice of bread, place other slice on top. 

2. Place in preheated pan on medium to medium-high heat, placing press on top.

3. Cook for several minutes then turn to brown the other side for several minutes. You don't need the press for the other side. It only makes the cheese ooze out.

4. Remove from pan and slice in half.

5. Serve with Tomato Basil Soup.

BON APPETIT!

Tuesday, March 2, 2010

Delicious And Blissfully Messy Caesar Salad Burgers In Memory of The Split T in Oklahoma City

Years ago, when I would spend summers with my paternal grandparents in Oklahoma City, we used to go eat at a hamburger joint owned by a former OU football player, whose name has inexplicably erased itself from my brain. The place was called The Split T (in honor of the old college football play that is seldom used these days) and was located on Western Ave. in the older part of Okie City, just down the street from the biggest Catholic high school in OKC, Bishop McGuinness, which was on 50th. They only served their specialty burgers which included such delicacies as a Theta Burger and a Caesar Burger, as well as the best french fries you could find in Oklahoma City at the time, which was the early 1960's. Burgers, fries and Cokes ruled during this era. I seriously doubt that anyone could match those burgers and fries, to this day. But, I digress, since we always know how unreliable childhood memories can be, right?

Still, all these many years later, I catch myself comparing each and every burger and order of fries to my childhood memories of those that The Spit T cranked out. The place was phenomenal for its time, I assure you. Otherwise, how could it possibly stick so prominently in my mind, above all others? I mean, I was eating those burgers well into my teenage years, so my memory surely can't be that bad, right? Right? Hello?

A couple of years ago, Mr. Snoots and I traveled to Oklahoma for my family reunion and I couldn't wait to take him there. Sadly, it was gone, which made my heart sink into the pit of my stomach. I wanted one of their Caesar Burgers so badly that I could actually remember the taste of it. It made me produce buckets of drool, but don't dwell on that image, okay?

So, I turned around and made my way to the old Charcoal Oven, which was still located on Northwest Highway then. Unfortunately, they didn't offer Caesar Burgers so I had to compromise and order a boring old run-of-the-mill Theta sauce cheeseburger. I survived, but I still had Caesar Burgers locked into the somewhat-of-a-memory area of my brain.

Then one day, Voila! Eureka! At long last it dawned on me that I could at least make the burgers for us at home, even if I couldn't duplicate their french fries. However, no matter how good the Caesar dressing is, it just doesn't compare. I challenge all of you to make this burger perfect. Frankly, I didn't want to use ground veal but Mr. Snoots insisted so I eventually caved in. As an Ultimate Challenge, I present to you:

Caesar Salad (Veal) Burgers:

The Caesar Recipe:

Ingredients:

1/4 cup Parmesan cheese, shaved

3 squiggles (about an inch long each) anchovy paste, or to taste

2 egg yolks, coddled and slightly beaten

1/4 teaspoon sea salt, freshly ground

1/4 teaspoon peppercorns, freshly ground

juice from 1 large lemon that is juicy (depending on the size, so adjust to taste)

1/2 cup extra virgin olive oil

8 big fat cloves of garlic, or to taste, pulverized (we love garlic!)

homemade croutons (hubby makes his own but I can surely do without them on my burger, thank you!)

Since Mr. Snooty makes the Caesar in this household (his mom's recipe), then you must realize that he has improved this recipe many times over the last 30 years. This is as good as it gets.


Directions:

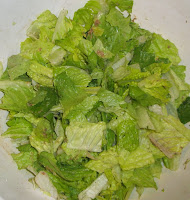
1. Apply the anchovy paste directly to the sides of the bowl and add the torn pieces of Romaine lettuce.

2. Add the coddled egg, salt, pepper, lemon, olive oil, pulverized garlic, and shaved Parmesan cheese. Toss vigorously for approximately 4 to 5 minutes. Serve immediately.

3. Top the grilled burgers with desired amount of Caesar salad and serve. I usually toast the buttered buns in the oven so that they are ready when the burgers come off the fire but you can also do them on the grill. I don't usually add cheese but it certainly doesn't detract from the overall deliciousness of the burger and it's really a complete meal, although you could add freshly made french fries for the bigger appetites.